Install ThinkSystem 430-8i SAS/SATA12 GB dense HBA kit into the compute node
Use this information to install ThinkSystem 430-8i SAS/SATA12 GB dense HBA kit into the compute node.
Before you install ThinkSystem 430-8i SAS/SATA12 GB dense HBA kit into the compute node.
-
Turn off the corresponding compute node that you are going to perform this task on.
-
Remove the compute node (see Remove the compute node from the enclosure).
-
Remove the compute node cover (see Remove the compute node cover).
-
Make sure the RAID adapter support bracket is installed. If not, install it into the node and secure it with three screws.
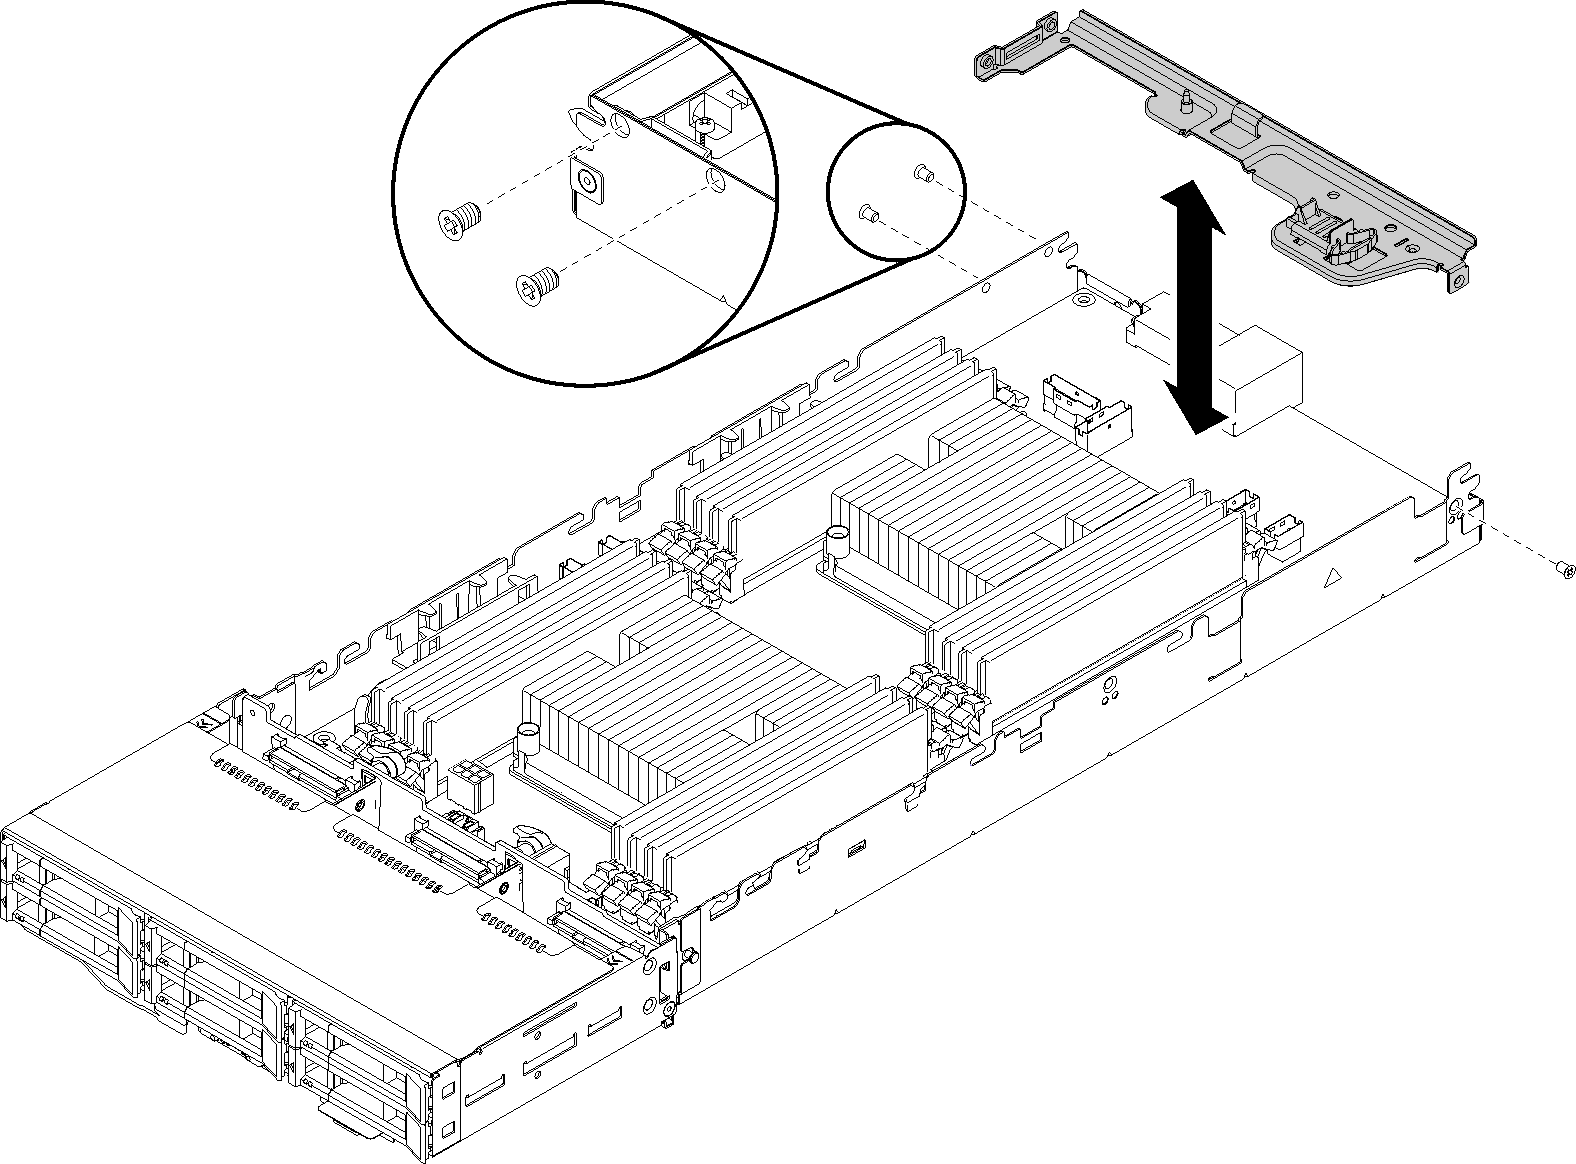
-
Touch the static-protective package that contains the RAID adapter to any unpainted metal surface on the node; then, remove the adapter from the package.
-
Place the RAID adapter, component side up, on a flat, static-protective surface and set any jumpers or switches as described by the adapter manufacturer.
Complete the following steps to install ThinkSystem 430-8i SAS/SATA12 GB dense HBA kit.
-
Connect the RAID adapter to the system board with the PCIe cable.
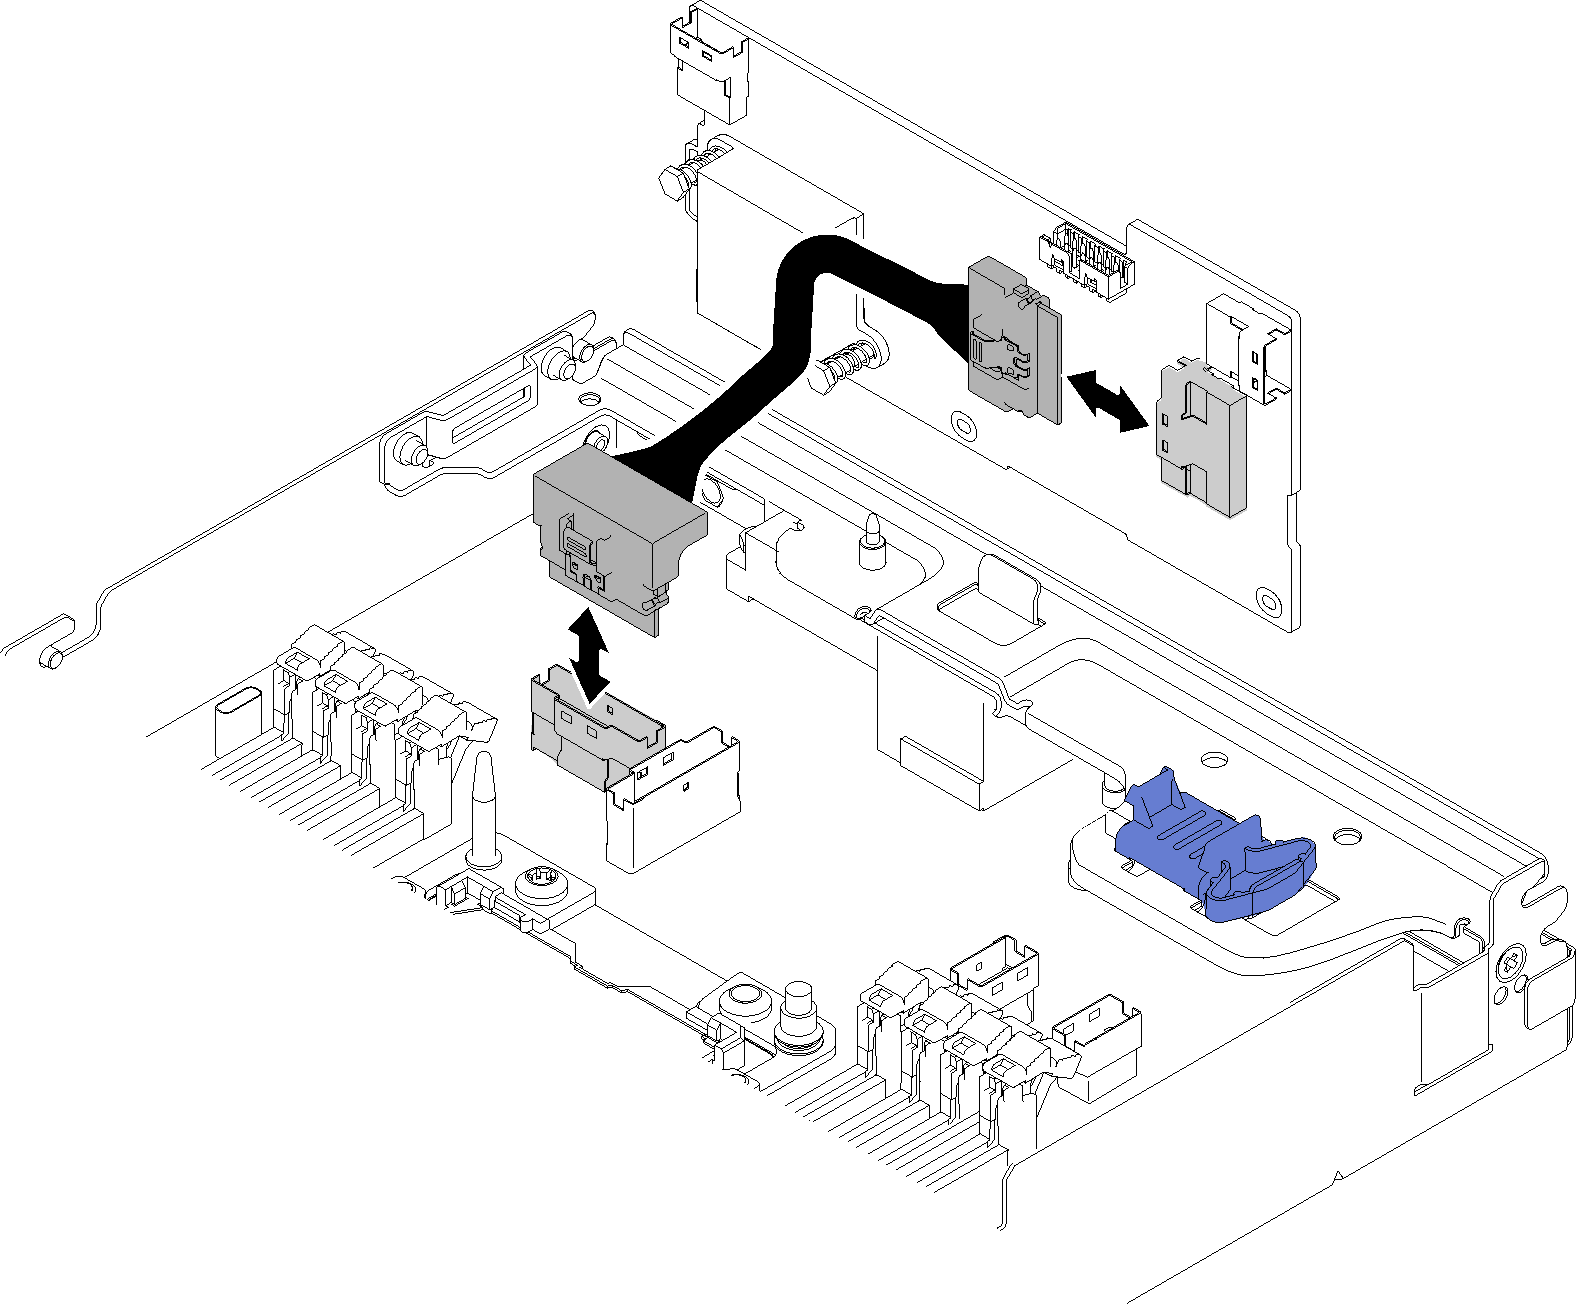
-
Connect the SAS/SATA cables (see Internal cable routing).
-
Insert the end of the adapter into the slot on the side of the node.
-
Align the other side of the adapter with the guide pin; then, lower the end until it snaps in place.
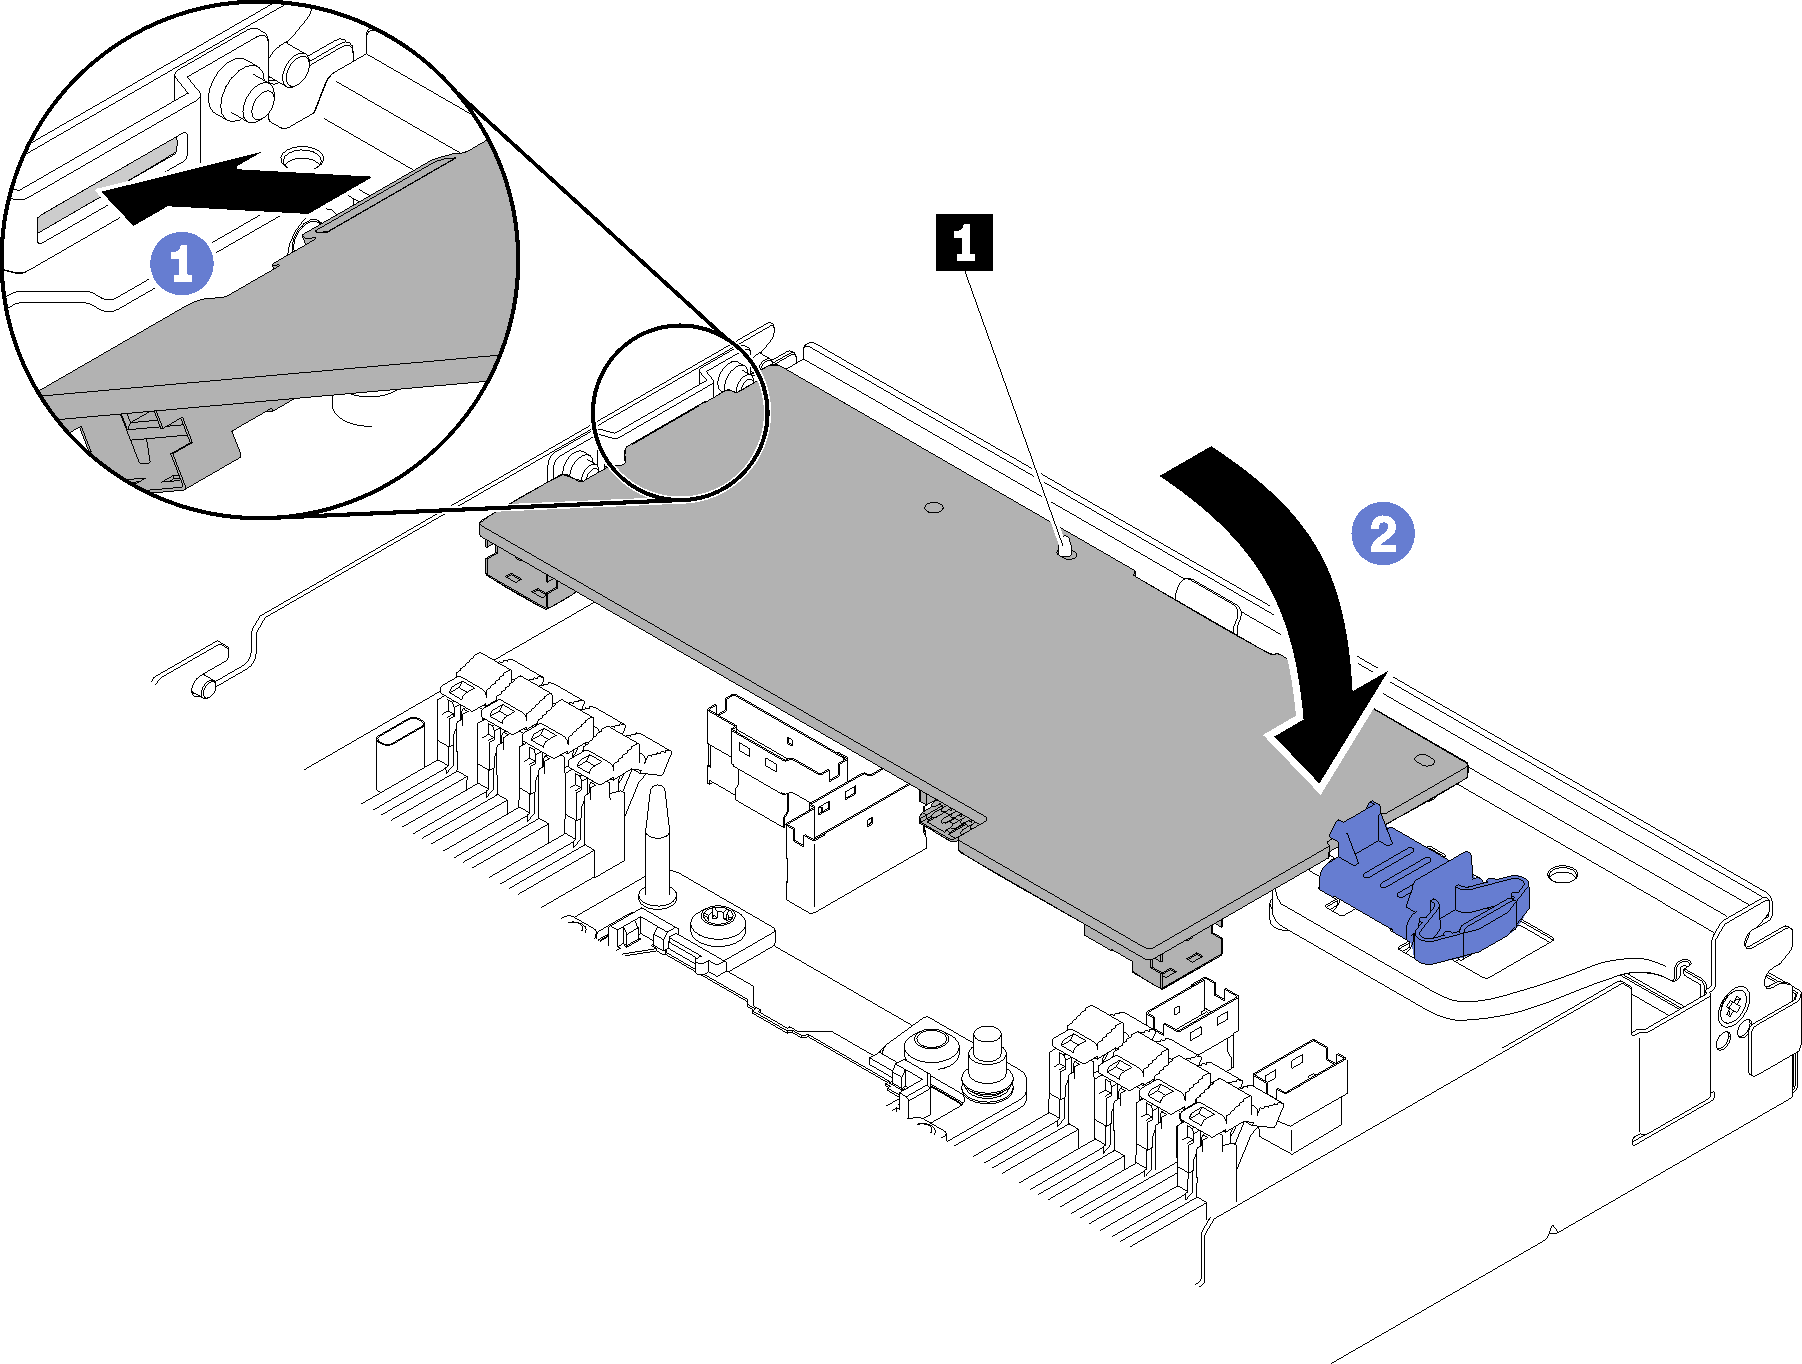
After you install ThinkSystem 430-8i SAS/SATA12 GB dense HBA kit into the compute node, complete the following steps.
- If the air baffle is removed, reinstall it (see Install the air baffle).
- Reinstall the compute node cover (see Install the compute node cover).
- Reinstall the compute node (see Install a compute node in the enclosure).
- Check the power LED to make sure it transitions between fast blink and slow blink to indicate the node is ready to be powered on.